Simultaneous Localization and Mapping (SLAM) has been there for quite a while, but it has gained much popularity with the recent advent of Autonomous Navigation and self-driving cars. SLAM is like a perception that aids a robot/device to find it's relative position in an unknown environment. Applications of which extend from augmented reality, to virtual reality, to indoor navigation, and Autonomous vehicles.
For implementing SLAM using a perceptive device, the algorithm assumes that we have the controls of the position of the camera (6 DoF: forward, backward, up, down, left, and right). If the camera is mounted in a vehicle(that navigate on land), usually the up and down movements are minimal(and can be neglected for plain roads). The visual SLAM uses some sort of point descriptors for both generation and localization. These point descriptors can contain a camera video stream, IR readings, Li-DAR depth estimates, etc. Based on these values, the algorithm generates a map of the environment. The algorithm then makes use of Kalmann-filter algorithm, where we take observations of known values over time and try to calculate the unknown variable(dependent on the known) values.In our case, we have a monocular camera as a sensor that streams the video feed to the server, where the computation takes place. Based on the video feed that the server receives, various feature points are detected and a descriptor dictionary/JSON is created that stores various information that looks something like this:
Key_point = {(x,y): {'Orientation': value, "relative distance':value, 'color': value, ...}
Once this is created, we have the known variables to process the unknown variable( Reconstruction of the map). Due to the hardware limitations(ran this on a surface pro 6), the project makes use of a Sparse ORB-SLAM algorithm instead of a dense one. This doesn't compromise the efficiency(for our test case) of the algorithm by much though. Let's take a quick look at what an ORB feature mapping is...
ORB Feature Mapping:
Oriented FAST and Rotated BRIEF(ORB) is a scaling invariant, rotation invariant, one-shot feature detection algorithm. As its name suggests, it is relatively fast and doesn't require a GPU for computation. The algorithm computes the key-points of a given train image and maps it with the test image. These key-points could be the pixel intensity, edges-detected, or any other distinctive regions in an image. These key-points are then matched based on the nearest 4 pixels(as opposed to 16 nearest neighbor matching used in SURF). It also up-scales and down-scales the training image to make the feature detection scale-invariant. Due to it being computationally inexpensive in nature, this algorithm can be used in CPU and even mobile devices. When running the algorithm on our dashcam video, we get something like this:
 |
Methodology:
The application begins with calibrating the camera and setting the camera intrinsic for optimization. It makes use of OpenCV's ORB feature mapping function for key-point extraction. Lowe's ratio test is used for mapping the key-points. Each detected key-point from the image at '(t-1)' interval is matched with a number of key-points from the 't' interval image. The key-points with the least distance are kept based on several generated. Lowe's test checks that the two distances are sufficiently different. If they are not, then the key-point is eliminated and will not be used for further calculations. For 2D video visualization, I had a couple of choices: OpenCV, SDL2, PyGame, Kivy, Matplotlib, etc.
Turns out OpenCV's imshow function might not be the best choice. It took ages for OpenCV to imshow a 720p video with all our computations. The application made use of SDL2, matplolib, and kivy's video playing libraries but PyGame was outperformed all of them. Thus, I used PyGame for visualizing the detected keypoints and various other information such as orientation, direction, and speed.
 |
1. Supports python and it's opensource!
2. Uses simple OpenGL at its fundamental form
3. Provides Modularized 3D visualization
For implementing a graph-based non-linear error function, the project leverages the python wrapper of the G2O library. G2O is an open-source optimization library that helps reduce the Gaussian Noise from nonlinear least-squares problems such as SLAM.
Results:
The implemented algorithm provides a good framework for testing and visualizing a 3D reconstruction of the environment based on Monocular ORB-driven SLAM. Being pythonic in nature, this implementation is not suitable for Real-Time visualization. We already have frameworks such as ORB-SLAM2 and OpenVSLAM for a c++ implementation of the algorithm. Said that, here are some demos for the algorithm:
You can find the full code here in my GitHub.
Introduction
 |
 |
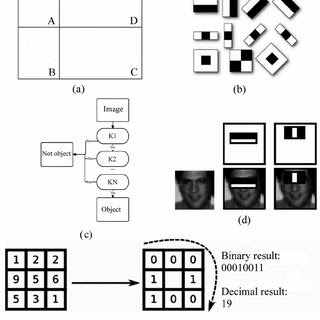
The eye sockets are darker than the forehead and the middle of the forehead is lighter than the side of it. If the algorithm finds enough matches in one area of the image, it concludes that there is a Face there. This is what is implemented in the Haar-cascade frontal OpenCV algorithm. But in order to augment a mask on top of the face, we need to locate the exact locations of our facial feature points. This is done using a Convolutional Neural Network model trained on a custom dataset of tens of thousands of facial images with manually marked feature points annotated with it. Based on this model, we get something that looks like this:
 |
At an initial stage, with the 67 landmarks detected, our face looks something like this:
The figure above shows the Facial landmark detected using a pre-trained dlib model. These points are now going to be used to create a mesh overlay of the face. This can now move, scale, and rotate along with our face. This is also how the face-swap feature is created. This provides us with a set of reference points to generate the desired coordinates.
 |
Next, I figured out the size of the mask and calibrated it with the face by calculating the Face Height and width. This is done based on the landmark reference points. This step is essential for resizing the mask according to the distance between the camera and our face. The final step is to combine the two images in and produce the output that looks something like this:
 |
The project includes 10+ masks to choose from. Here are some of the examples:
 |
 |
 |
 |
The next step is to implement 3D masks that rotate and react to our Facial movements. You can find the complete project here: https://github.com/Akbonline/Snapchat-filters-OpenCV
Feel free to share, comment, and like the post if you did! You can reach out to me through my email if you have any queries: akshatbajpai.biz@gmail.com
Thanks for reading!
Buzzfood: Shazam for food!
The name says it all. This is an iOS application which detects the name of a cuisine in Real-time, very much like the popular Shazam application but instead of the songs, its for Food. Users can either select a picture from their gallery or they can capture it through the live feed of the camera. The idea came to me when I was watching the HBO's comedy TV series Silicon Valley. In the show, Jin Yang creates an application that can only detect if a food is Hotdog or not. So I decided to create one that detects all the foods.
Methodology
The implementation started by searching for opensource pre-annotated datasets or pre-trained model. I couldn't find any good ones. Therefore, I decided to create my own and contribute it to the opensource community. I had a couple of options for creating and training our model: PyTorch, YOLO, TensorFlow, etc. I was looking to use the model in an iOS application. So that filtered out the options leaving me with tiny YOLO, TensorFlow lite, and CreateML. CreateML was an obvious choice.
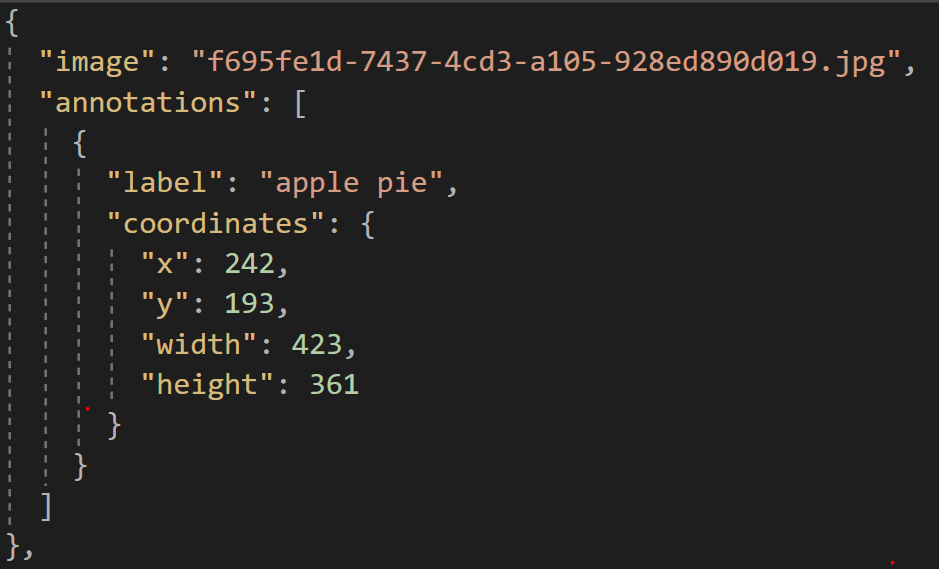
For the custom dataset, I chose IBM's cloud annotations web tool. CreateML uses the following format for annotating its datasets and building:
Alright, lemme explain this JSON a lil bit:
=> "image": This tag contains the name of the image
=> "annotations": is a list containing all the following sub-fields:
- "label": Contains the category of the food detected. In this case, its an image of an apple pie
- "coordinates": is a dictionary containing:
> "x": the x-coordinate of where the bounding box begins
> "y": the y-coordinate of where the bounding box begins
> "width": the width of the bounding box
> "height": the height of the bounding box
This dataset contained 1500+ images of 25+ subclasses including: burger, pizza, bagel, rice, apple pie, doughnut, taco, calamari, sushi, etc. Using this dataset the convolutional neural network model was trained over 14000 iterations that took almost 4 days on a Macbook Pro early 2015 model(still pretty awesome). Fortunately, the results were really astonishing.
While the model was training, I built up the UI for the iOS application. The application contains 3 views(like snapchat): Main screen, food detection on images from gallery and Real-time food detection. For the buttons, I created custom neumorphic buttons. The model is imported using CoreML and for every detections, according to the highest confidence level, detected food name is displayed. If a food is detected in the image, the background turns green with an affirming "ding" sound. If no food is detected, the background turn red with a dissapointing "dong" sound.
Demo
The finished application looks something like this:
If you found this project cool, please join me on my twitch live coding the entire project.
Thanks for reading!


